Showing posts with label Painting. Show all posts

July 2, 2011

Laundry Sneak Peek

Well I wish that our laundry room could be presented with one grandious reveal - with the traditional before and after pic presentations.  But, I think this blog has been very truthful in the reality of my life not at all representing an episode of Divine Design or Sarah's House - and NOTHING is ever finished in one easy motivated attempt.  I have kids, we are not professionals and we have a very limited budget.  Almost everything we do it DIY.  And....I'm a bit of a 'project hopper'.  Instead - I'm thinking this is going to come with about fifteen sneak peeks and a slow slow slow progression.  But today I am happy to announce that my new laundry/mudroom walls - have been painted and some base cabinetry has gone in! K - that seems like ummm....not alot.  but here's the pics....


Before... (you know I like to go back to worst case scenario for the glory shot!...)


To walls....


And now...


And we actually built the two cabinets on either side of the washer and dryer with our own four little hands and just bought the doors so, I'm actually pretty proud of them!  Saved us a ton of moola too!  They had too be higher to prep for the counter top that will eventually span across the length of the back wall.  


Baby steps!....next project I believe is the floor....Tired of trying to scrub cracked concrete clean... :(


March 22, 2011

FAMILY vinyl art

They say that imitation is the finest form of flattery...and well....I saw this sign on Crafts by Amanda and totally loved it! So...hoping she's flattered because...COMPLETELY ripped it off! :)


Although - sad to say that I was working with small little sheets of vinyl and not one large one shot deal vinyl print-out so,...I had to squish the letters on little sheets and pick off each letter one at a time and place it on the plywood. Sucks to be me - and not every letter is 100% straight...but I'm happy with how it turned out.  So - $10 for the white vinyl sheets, some paint, my Silhouette, a sander and a piece of plywood!  Shawbang! Perdy art.


And thus, another post....and I've bought myself a few more days of guilt-free creative unproductivity! :)  


January 2, 2011

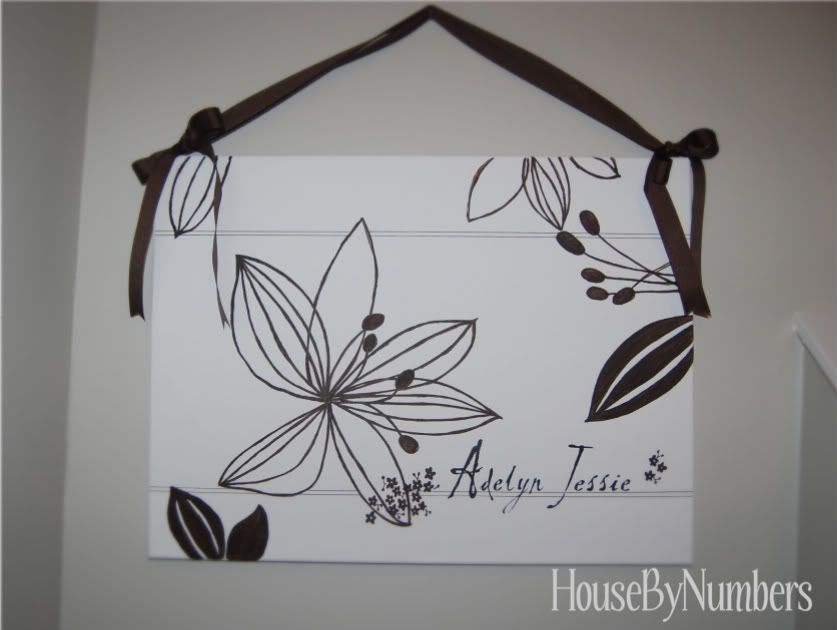
Nursery Canvas Painting

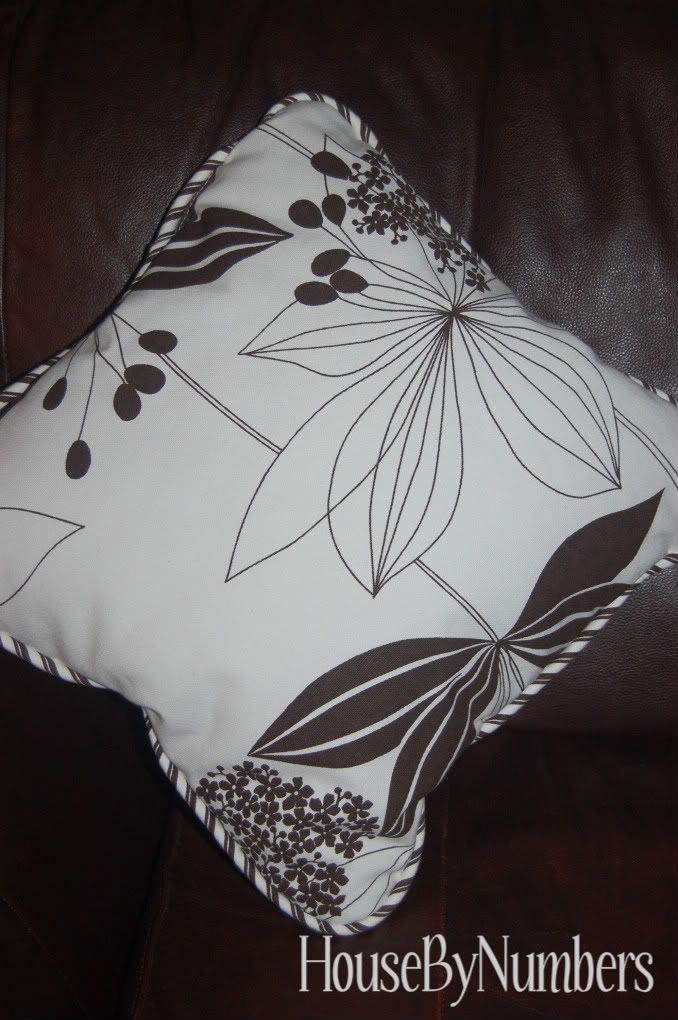
So now that the Christmas decor has been put away it's more than time to start finishing up/starting some fun new projects around here.  Our good friends had a little baby girl before Christmas - pretty much the tiniest little bundle of loving I've ever held at six and a half pounds - being that my babies have been, umm....less tiny. :)  Anyway - she is absolutely beautiful and we could not be happier for the new happy family!  They asked me to paint a canvas for her nursery to match their bedding and I finally sat down and finished it up this afternoon.   So - here she be...  


I used the decorative pillow and tried to freehand somewhat of a duplicate version for the wall.  I think it turned out cute and I'm super excited to see it in the nursery... K - mostly I just want an excuse to go get some more new baby cuddles.... MMm...... :)


I love projects that can be done in a few hours!  Instant gratification! :)  Anyone else have some easy new projects on the go?


Ralna

November 19, 2010

Bathroom Update on the Cheap.

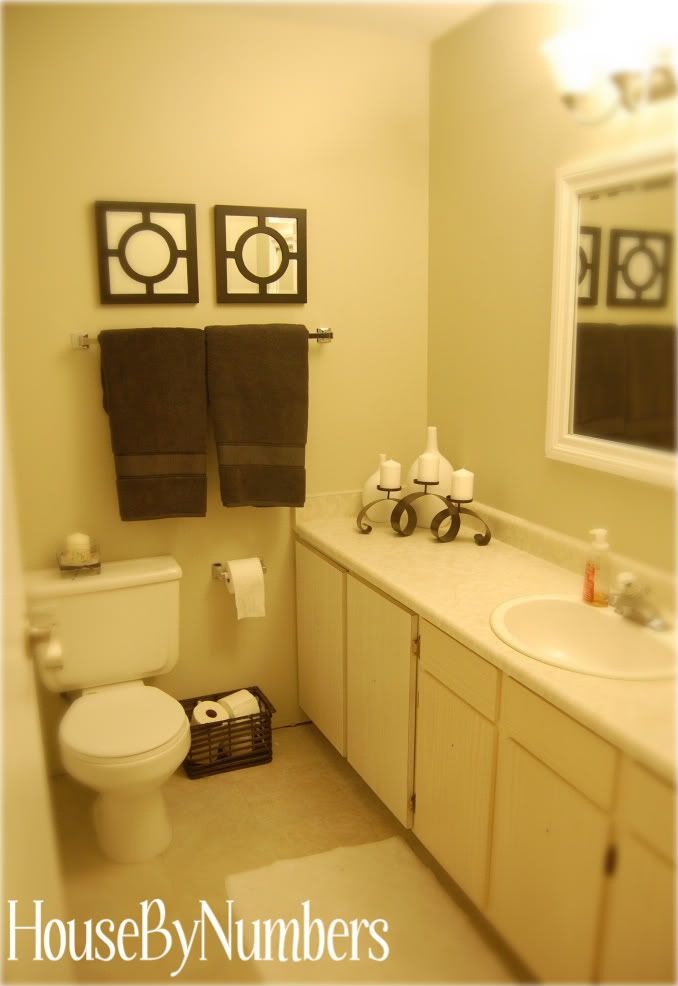
So , it remains in our plans to properly renovate our main bathroom - with a new vanity, flooring and mirror - but that's looking like a year away at this point, and I wasn't content looking at this....


It was one of the only rooms that hasn't been painted since we moved in and one of the two left with patchy canary yellow walls and door. - k, please don't paint your doors canary yellow.  ever.  it doesn't have the "sunshiney" effect you would think at seven in the morning.... 


So - some left over paint (FREE),  some new towels ($30), a toilet paper holder ($10), two small mirrors ($15 each) - and some moulding for around the mirror ($12) - a grand total of $82 and I I am MUCH calmer in the morning! :)  We did also replace the lighting fixture a few weeks after we moved in - although now I'm not sure why we EVER elected to get rid of the brass hollywood dazzle strip! :) I do have a new faucet that still needs to be installed, I'm going to paint out the vanity doors white, and I need some more artish filler for beside the big mirror (taking suggestions for that please!) - but it think it's largely improved.


So, please....help me fill the wall space??

October 24, 2010

Laundry Room

so - remember my ugly little laundry room?  


(and just to get credit for work already done, I've once again gone back to pre-possession pictures...)

so - we took out the small little cold room - because well....I do laundry more than I can preserves.  I actually think I do laundry more than I wash my hair.  'er....and this to suggest I do ALOT of laundry - not to suggest I don't shower...awkward... :) but we also tore out the summer kitchen - which I THINK is designed for use to FILL the cold room?? and well...I wash my hair more than I cook.  So really no need for two stoves.  


Sadly, however, removing the wall and cabinets also revealed cement floors - yet uncovered by peel and stick fake hardwood floor tiles.  Not that floors without peel and stick fake hardwood floor tiles are a bad thing.  but patchy dirty nasty paint peeling cement floors are also not cool.  K - there's actually just nothing cool about this room.

but - this week-end we spent many many hours on our hands and knees doing this...


Pretty sure some of those babies were placed directly on the wet concrete because well....it sucked!  I need a manicure and a back massage.  But all this to say - now, when I do laundry and drop half the load on the floor on their way to the dryer....I am LESS likely to have to rewash them.  K - I wasn't ENTIRELY likely to do it before either....but now I can feel less guilty about it.  

But any of you have any helpful tips that would have popped those suckers right off the floor and saved me my back and about ten hours of my life....?? :) (Not that I REALLY want to hear them now...!!)


Ralna

October 6, 2010

Master Ensuite Progress

So - It's seems a little redundant to say that this room is not done - as I have yet to finish ANY room in our house,...but it's a little progress and if I waited to show you my house until it was done...well,...we would have very little to talk about. :) Again - with the attention span of a gnat and the money of a....umm....a person with no money...(nice save.), I was able to focus long enough to paint the room - but do little else.  baby steps! :)


So - here's the progress.


Before
Apparently these were taken before I learned how to turn on the autofocus.  Sorry....

After
Yeah - the seashell is still there... Sadly, I don't notice it anymore so my motivation to change it has been distracted...
The stripes show up more in person - but they are still pretty subtle.  LOVE LOVE LOVE them!! :)
Next time as a special treat - maybe I'll even take the four seconds to fold the towel... probably won't make the bed in the background though! :)


But - off to chase something shiny..... :)  Have a great day!


Ralna

October 2, 2010

Finished Craigslist Find

I finally bit the bullet and dug out the sandpaper today.  I gotta say - I was SERIOUSLY chicken!  But I think it was a definite improvement and brings out the detail in the carved arms.  My first actual attempt at "weathering" with the paint layering, sanding, and I finished it with a super light stain wash on and off - which totally changed the look as well and I think matched it to the fabric even more!  Tried not to stress too much about it being perfect and "symmetrically" and evenly distressed - silence the OCD part of myself - because I guess that is technically the whole point of distressing - to make it look old and naturally "UN-perfect".  But it's hard...there's still the sick little part of me inside that wants to go back and match ever "wear" with an equally worn mirror reflection on the other side.  I need help don't I?


And because it's always fun to do a good before and after....


Have a great night...


Ralna

September 22, 2010

Craigslist Freebie

So - completely shocking - but a few months ago some unknowing sucker posted this beauutee for FREE on Craigslist.  Ummm...crazy??  I think so.  So we jumped all over that like a fat kid on a Smartie - and gotta say I was genuinely surprised that we were the first to contact them given it had been posted for a few days already. LUCKEEE!


No, I do not, nor do I want to, know - the source of the giant stain across the seat....


So I know very little about reupholstering, but I do know that it's possible to make it look better than that. I started by sanding it down with an orbital sander and some hand sanding, primed it and then painted two coats with a soft green that I was hoping will be pulled out with distressing and match my fabric. I then spray painted it a few coats with white spray paint.


I then started pulling it apart and stapling on the new fabric...

Unfortunately, I wasn't quite feeling it - the white and the fabric were not going at all. The contrast was too stark and I wasn't too excited about repainting with the new fabric on.  So - this is where I left the room, and decided I was going to post it on Craigslist for free. Umm....lesson learned.  Perhaps next time I'll just stick with the box of Smarties...


A week later I decided to regroup and try to attack it again. - with cream.  Looking SOOO much better.


The plan is to start distressing with some light sanding and a stain - but to be very honest....TOTALLY gun shy.  is there a trick?  there's gotta be a trick....and this is where you tell me the trick..... :)


August 3, 2010

my $2.50 project

So today I took an hour of my day and finally started the project I've been thinking about for weeks now to try in our guest room.  I totally stole the idea from here, and just made up a stencil with some card stock.  I then used my $2.50 acrylic silver craft paint from Wal-Mart and a little craft paintbrush and took the plunge!  


Originally I thought I would do it all across the back wall - but now I'm thinking I like it in the corner.  I will most likely do one strip on the other wall kitty-corner across the room as I do still want to add my headboard and don't want it to be too much.  But I'm pretty happy with it - think it made a big difference in adding interest to the room and was definitely within the budget at this point! :)  


Before
After


CHEAP AND FAST! ;)


July 15, 2010

my casa

So, check it out....  polished up our front step - painted the railings, doors, power washed the concrete, moved the house numbers, new mailbox and door handle and lost the screen door....oh yeah, and killed the tulips. Actually,....THAT was probably Mom M and Kristy! :)

before

after

seriously impressive hey??  (I have a REALLY good camera.  sometimes things don't look exactly as photographed....)
But here's from a different angle...

Have a good one!


Ralna

June 19, 2010

our colors.

I put the final color selection on the wall yesterday and absolutely LOVING them all.  I guess I still have to pick the colors for guestroom and guestbath....but here's the rest....

my three main colors...

White Sand - Living Room/Master Bedroom/Ensuite
Hazy Skies - Front Entry/Stairs/Hallway
Sea Haze - Kitchen/Family Room/Laundry Room
and then for the bonus rooms...

Pink Bliss - Claire's Room
Nimbus Gray - Jaden's Room
Pale Avocado - Main Bathroom 
the pictures don't really show the true colors...but the general idea.  Needless to say - my paintbrush and I are very well acquainted.... and I've still got 5 rooms to go...??